Target Users
- who want to use GAS(google apps script)
- who need paid leave management system but not prepared it
- who want to perform paid management at zero cost
- who have built an internal system centered on GAS
List of actual setting procedures
Intro of setting procedures list
First, we will look and explain what needs to be set before explaining script.
- Set up Google Form for paid application
- Set the required elements on the spreadsheet sheet
- Set up Google Form URL to call from Slack Bot
Setting task1: Set up Google Form for paid application
First, open spreadsheet and insert Google Form from spreadsheet to linkage both.
Procedure:[Insert]→[Form]
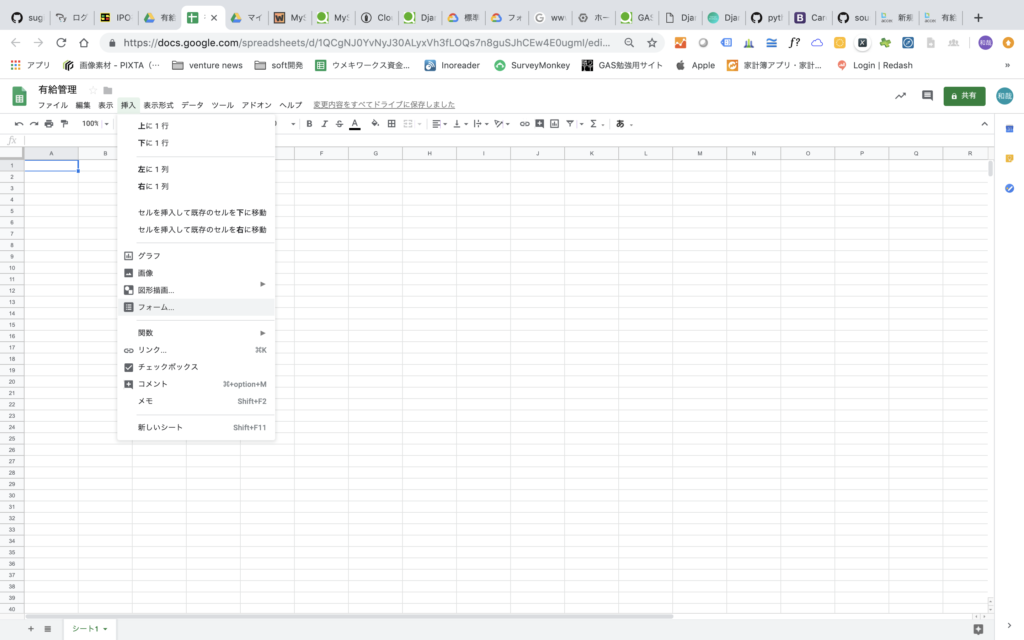
when clicking “Form” button, spreadsheet creates sheet for summarizing the answer from form and Google Form with binding spreadsheet.
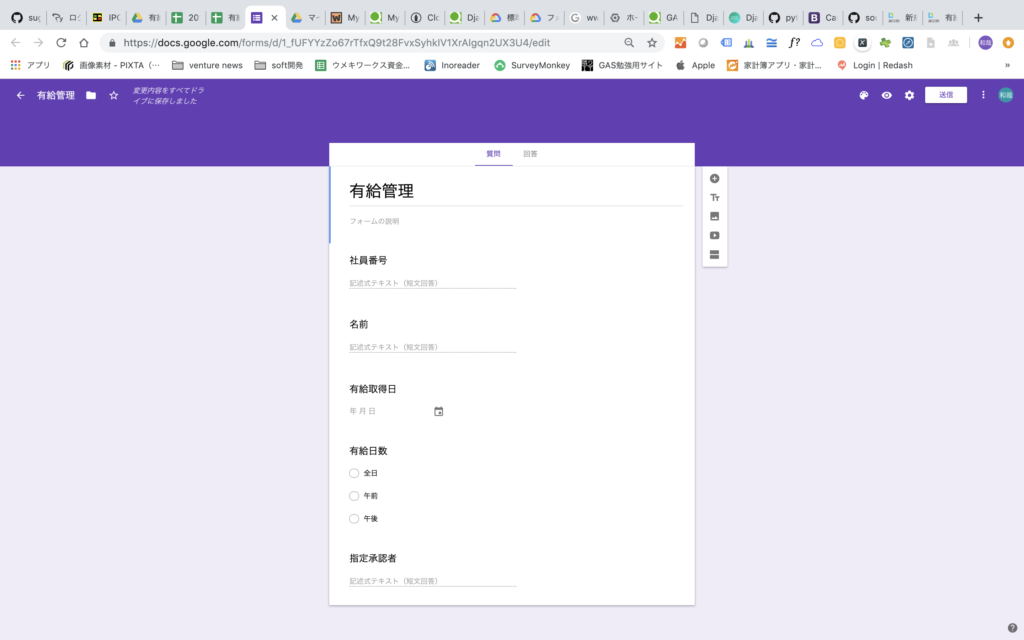
Enter the following information in the form (these are examples only, so please enter the information appropriate for each company. However, in that case, you also need to change the script itself)
Employee Num :[Short answer]
Name :[Short answer]
Date of Paid leave request:[Date]
Days :[Multiple Choice(all day/ AM/ PM) ]
Approver:[Short answer](However, this content is not used this time)
With the above settings, a sheet is automatically created in the spreadsheet with the answers collected, and the first row contains the element set as the question.
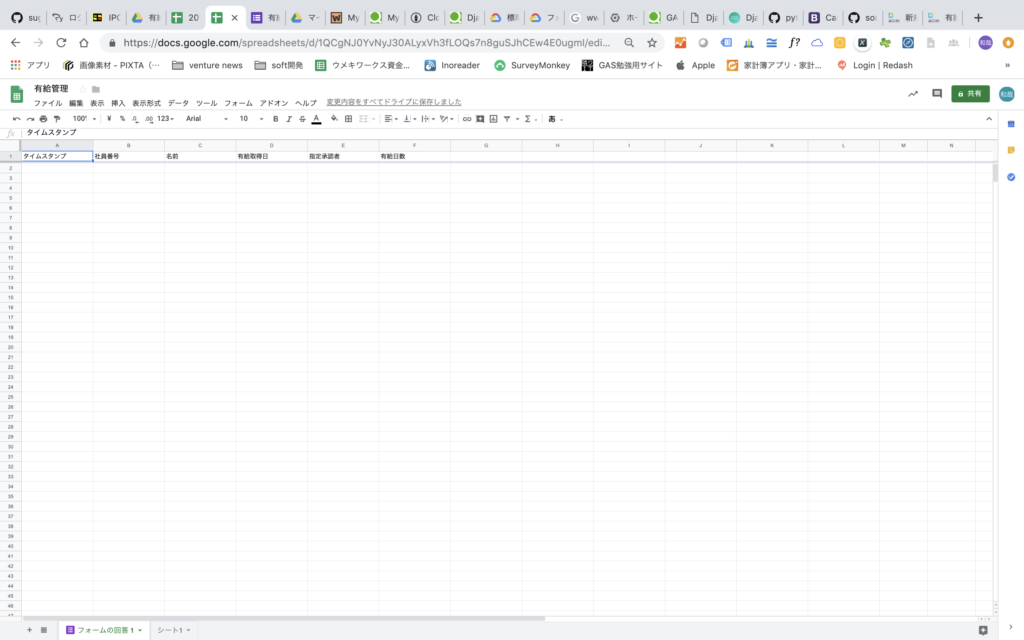
Setting task2:Set the required elements on the spreadsheet sheet
We will slightly modify the sheet for which the Form answer aggregation sheet has been completed.
That said, there is nothing special, only changing the sheet name and creating a simple employee master.
Changing sheet name
sheetName:【Form Responses 1】→【有給申請管理】(*)
Later, sheet name as variable is using in script, so you can use any name here, but you will also need to change the corresponding script.
(*) original script is based on Japanese, so sheetName need setting Japanese. if you want to change from ja to en, please modify also script relatively.
Creating simple employee ledger(sheet_name:mail_adress_master)
This is a sheet to identify the person who applied for the form (applicant) and send it to the approver by e-mail. The purpose is to match the applicant and the approver and to get the email address of the approver.

ColumnA:employee ID
ColumnB:Employee Name
ColumnC:Approver Name
ColumnD:e-mail address of approver
That’ all for Setting task 2.
Setting task3:Set up Google Form URL to call from Slack Bot
Now, finally, Slack Bot settings.
As for SlackBot, this time we only need to add a customized automatic response, so I hope you can refer to the following Slack Official article for reference.
https://slack.com/intl/ja-jp/help/articles/202026038-Slackbot-%E5%85%A5%E9%96%80
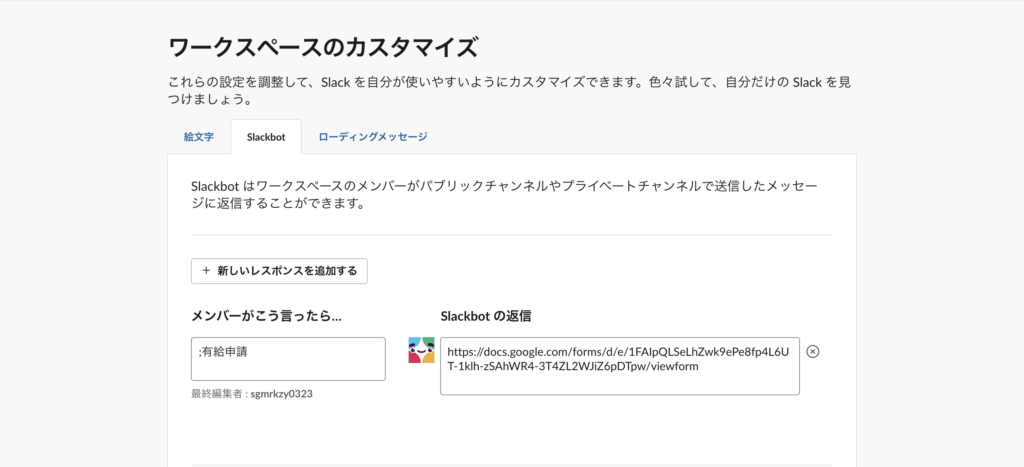
In my case, when I chat about “;有給申請” on slack, slack bot will reply URL of Google Form as setting above.
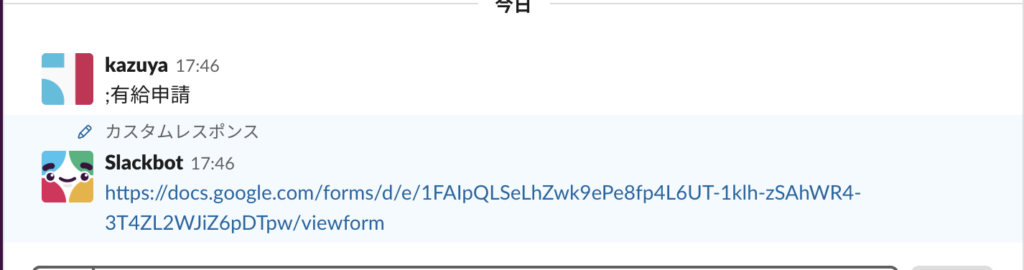
actual response as above image.
Finally,
This time, I explained various settings that are the premise of the code. First of all, try this case pattern, and if you get used to it, I hope you can add more customizations.
連載目次: GASで有給取得申請管理
- GASをフル活用して有給管理システムを自作する
- GASをフル活用して有給管理システムを自作する〜利用コードと実際画面フロー〜
- 【コード解説シリーズ】GASをフル活用して有給管理システムを自作する〜まずは設定から〜
- 【コード解説シリーズ】GASをフル活用して有給管理システムを自作する〜申請者がForm登録したタイミングで承認者にメールを送る(GAS htmlメールの設定とトリガー設定)〜
- 【コード解説シリーズ】GASをフル活用して有給管理システムを自作する〜承認者がメールの承認・否認を選択→申請者へ結果通知、承認者へ完了Web画面表示〜